


by Guest Writer- Jessica Smith
Random wire disconnections are a significant cause of many electrical accidents. With a basic knowledge of safety measures and a few tools, you can safeguard your home from such disasters.
Sometimes your appliances go rogue without any reason. A well functioning electrical system is not always about sophisticated gadgets and state of the art technology. Basics, such as safe and robust wire connections also matter a lot. Tired of running to the electrician every time you have a broken connection? Here is how you can fix random wire disconnections at your home with simple tools.
Using a Wire Connector
For safety always switch off your appliances before repairing any wire. And most importantly know the basics. Before going ahead with any wire repairing, you should be familiar with wires and cables. For example, know what a gage size is and the difference between spt-1 vs spt-2. Binging on videos won’t help. Do your homework! This one is a no brainer. Make sure you disconnect the wires from the power source.
1. Wires come with outer insulation. The first step involves stripping off the insulation on the wires using a wire stripper. One common mistake people do is to use a knife or a wire cutter to take off the outer insulation. This could be potentially dangerous and can also damage the wires inside the insulation. The best thing about a wire stripper is that it comes with numerous stripping holes of various sizes. These holes have numbers marked alongside them. A smaller number denotes a bigger hole and vice-versa. Place your wire in the right hole and strip 1/4th inch of the insulation on one end.
2. Now we need to fasten the loose ends together. In case you don’t have enough space inside your appliance or you have run out on wire slack, a crimp connector can come in handy. Place the ends inside the crimp connector and squeeze the connector with the help of a crimping tool.
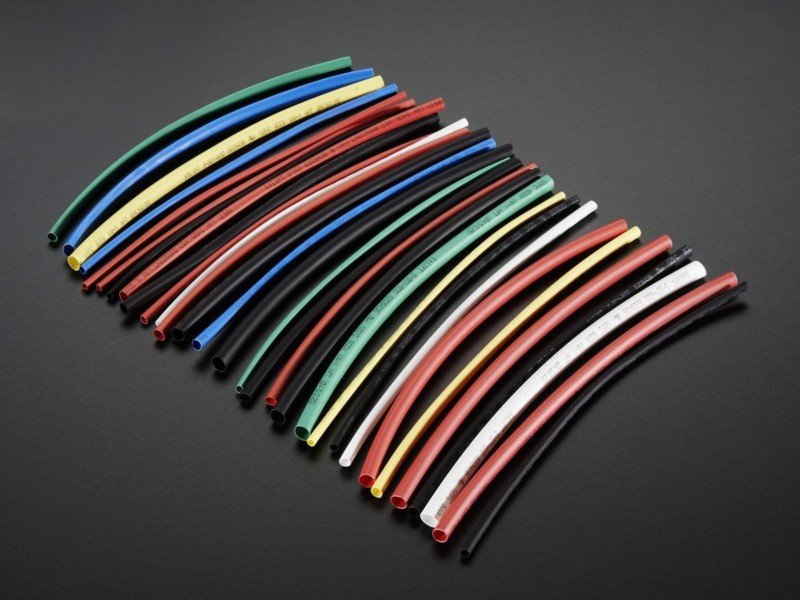
3.You can also go a step further here and seal the connector with a heat shrink tube seal. These tubes make your connection waterproof and lock it in place.
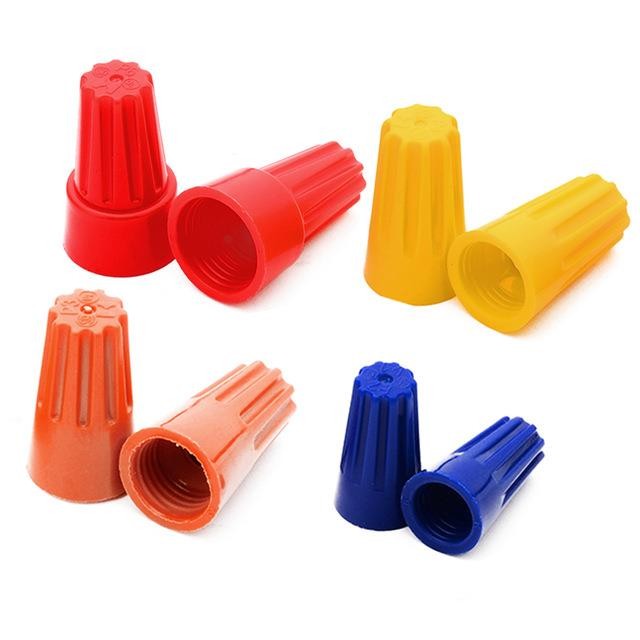
4.If you have plenty of wire slack, you can even use a wire nut. Ceramic wire nuts, in particular, can withstand a lot of heat and are the best option for an appliance with a high-temperature rating. To use a wire nut place both the ends of the wire inside the nut and twist them securely. Next, seal the exposed end of the wire nut using a silicone. This prevents the wires from catching moisture.
Solder Wires
Soldering is one of the most full-proof methods to get a secure, leakproof connection. The process of soldering involves taking two or more wires, joining them together and applying heat externally to melt the wires into one solid connection. This is how you can safely fix your wires using soldering, and the best part is, it doesn’t require many tools.
You are going to need a good soldering gun, some flux, and solder, wire strippers, heat shrink tubes, a heat gun, wire crimpers, a sponge and safety glasses. NEVER skip out on your safety glasses. When you solder, there are chances of the solder splashing, and that could cause some severe burns. Another safety tip is never to solder near flammable materials as any dripping solder can start a fire. The smoke from soldering is toxic, and exposure to this smoke for prolonged periods can create health problems. So, it is better to solder in open areas with proper ventilation.
And last but not least, most solders contain lead. Always remember to clean your hands and tools after soldering. Although lead solders are not exactly an environment-friendly option, sadly these work better than other solders available on the market. They have a lower melting point and absorb effortlessly into the coil. When you are dealing with tight spaces and small wires, you can use a soldering iron instead of a gun.
If you use the correct tools, soldering is the easiest thing to do. Let go soldering!
-

https://www.amazon.com/Soldering-Electronics-Adjustable-Temperature-Portable/dp/B071VLFGXL Strip the wires using a wire stripper making sure the strands are safe, You can either use an automatic wire stripper or the good old wire stripper with gage markings.

- Choose a heat shrink tube that fits your wires, slide it down on one end of the wire. Make sure it doesn’t come in contact with the soldering device.
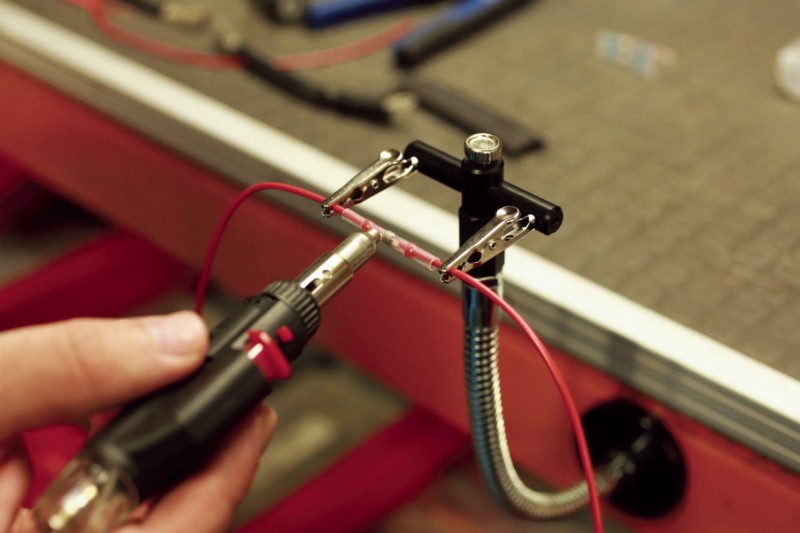
- Now take the loose end of the wire and separate the wire strands. Mesh them together into a bundle and using helping hands, clamp the wires in place. Rub some flux on the intermeshed wire bundle.
- Heat the soldering iron and clean any oxidation from the tip using a damp sponge. What we want is a tined tip.
- Using the soldering gun, heat the copper wires. Slowly feed the wires with solder, from the top.
- Once you are done adding the solder, remove the gun and let the setup completely cool.
- At this point, you can take some silicone and slather it on the soldered area. Now slide the heat shrink tube over the area and seal it using an external heat source.
-
We have a stable, waterproof wire connection ready!


